Device firmware Quick-Start
The easiest way to get started with MirTOS on your device, is to load it with the MirTOS loader, which will install the firmware with a minimal configuration.
Quick-Start with WeMos D1 shield and Arduino IDE
The easiest way to get started with MirTOS on your device, is to load it with the MirTOS loader, which will install the firmware with a minimal configuration.
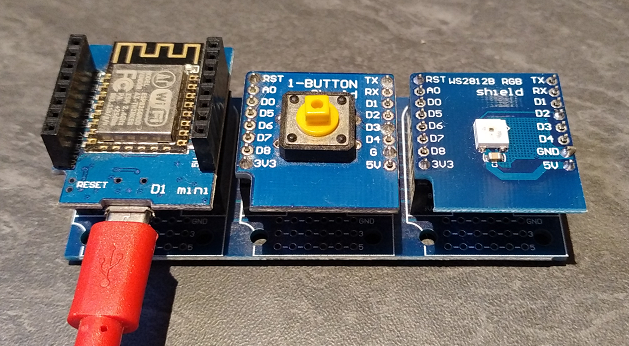
First example will use a standard WeMos D1 module with two shields (button and LED). Same example can be used with Button on Relay shield.
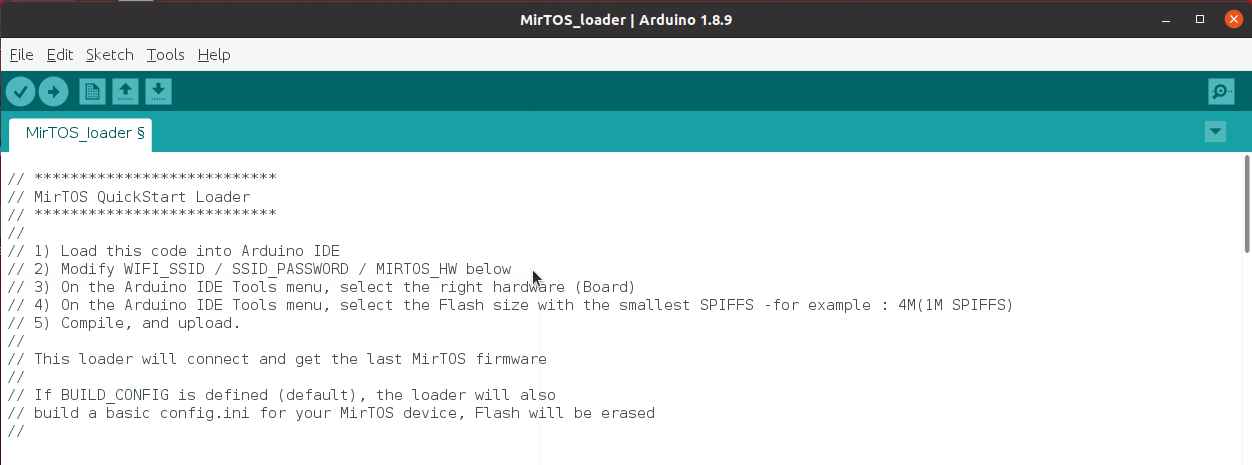
1) First, download the short loader code at http://www.mirtos.org/quickstart/MirTOS_loader.ino and open it on the Arduino IDE
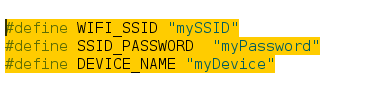
2) Modifiy the code to specify your Wifi SSID and Wifi password, the name you would like to give for your device, and the device type:
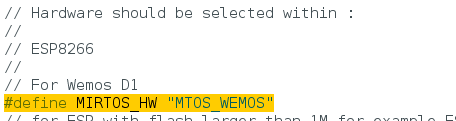
3) Select the right hardware for the device into the Tools menu of the Arduino IDE
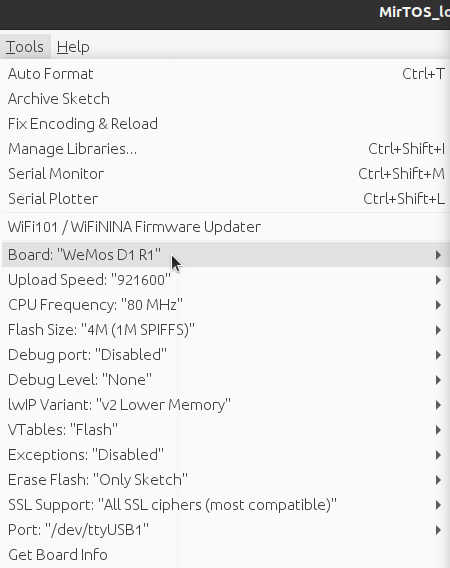
4) Select the partition (menu Tools) with the smalest SPIFFS size

5) Compile and download to the module....
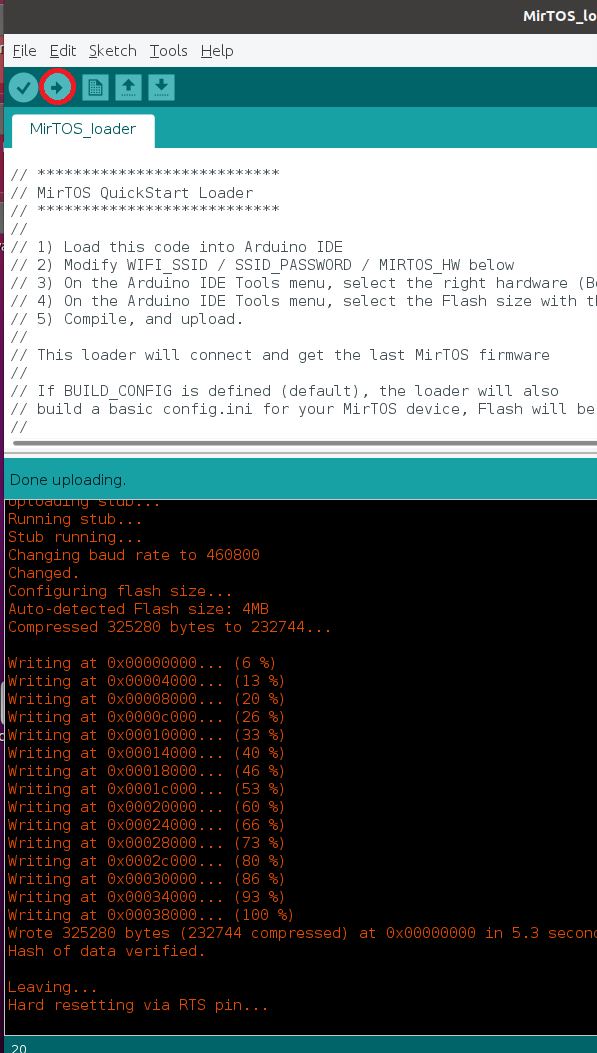
On the serial terminal, you should get :
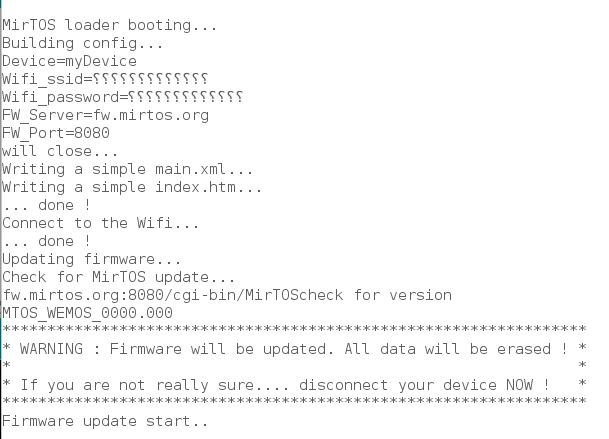
Then
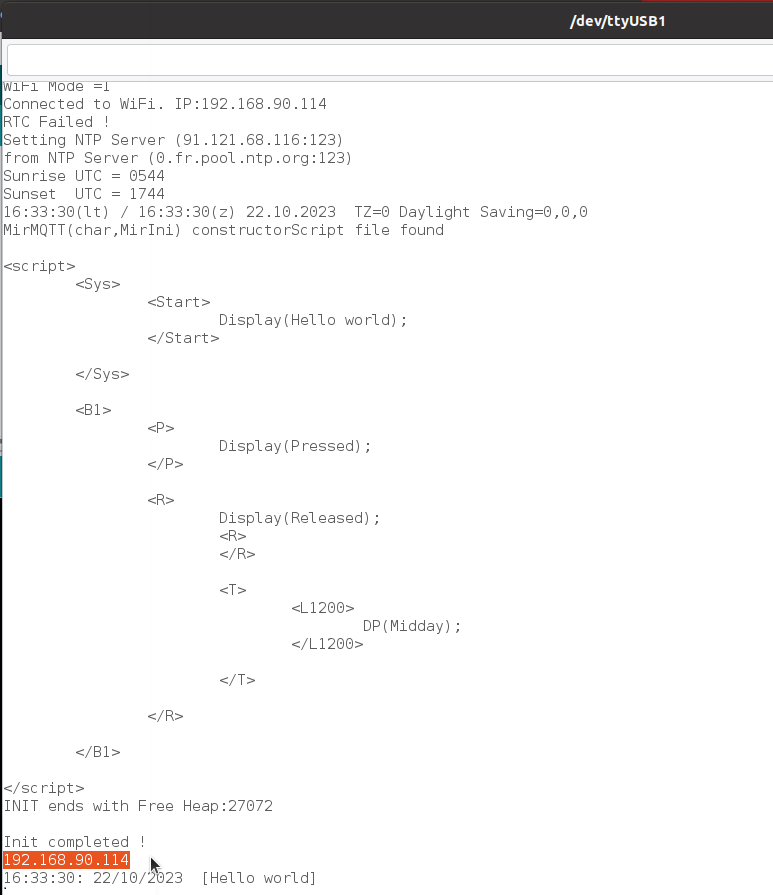
Terminal will show the IP of the device. Use that IP to open the device into a browser
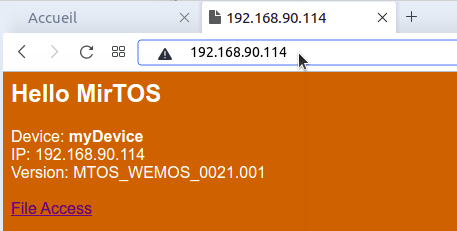
You can acces the 'in module files' with the 'File Access' link on that page.
We will now, for this short example, configure the module to respond to the button events with the led.
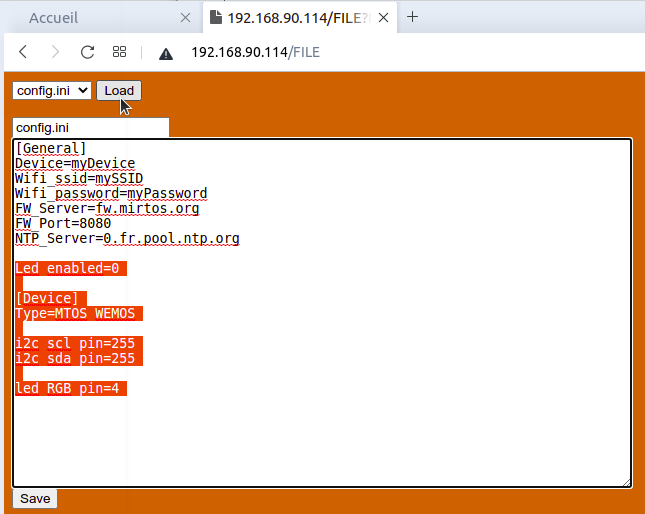
First, with the config file (select config.ini, then Load button)
- We first desactivate the 'build-in led usage' by adding, into teh [General] section the line Led_enabled=0
- Desactivate the I2C lines in [Device] section by adding i2c_scl_pin=255 and i2c_sda_pin=255
- Activate the RGB led line by adding led_RGB_pin=4 (on Wemoas D1, the D2 line is the GPIO 4)
Press the Save button.
It should look like :
We will now modify the 'program' to enable action on events.
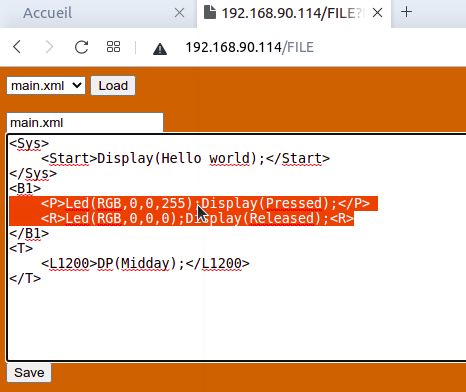
Open the 'main.xml' file (select main.xml, then button Load)
Modify the Event <P> (pressed) on the button 1 (<B1>) with adding :
Led(RGB,0,0,255);
and on Event <R> (released), add :
Led(RGB,0,0,0);
Remark, if you have a Relay Shield, you can add on Event <P>:
Relay(1,T);
where 'T' means 'Toggle'
Press the Save button.
It should look like :
Now the module has to be restared (bouton Reset on the device or button reset on the page, or by typing RT(); on the serial interface)
After startup, the device should "light on" when pressing the button....
ESP 32 example
In this example, we will use a ESPR4 board with a generic ESP32 firmware. The board looks like :

The process is the same as for the WeMos :
1) Download the loader at http://www.mirtos.org/quickstart/MirTOS_loader.ino
2) Modify the code with your Wifi SSID / Wifi Password / device name
But, instead of define the Wemos hardware (#define MIRTOS_HW "MTOS_WEMOS" has to be commented) you should select :
// ESP 32
//
// DevKit 1
#define MIRTOS_HW "MTOS_ESP32_DK1"
3 and 4) Specify hardware and flash organisation. If you are using a platformio project, the platformIO.ini should look like :
[env:esp32]
platform = espressif32
board = esp32dev
framework = arduino
; change microcontroller
board_build.mcu = esp32
monitor_filters = esp32_exception_decoder
board_build.partitions = min_spiffs.csv
monitor_speed = 115200
5) Compile and download...
Open the browser, and go to the FILE page.
In the config.ini, you should specify your board :
[Device]
Type=ESP32R4
You can save and open the main.xml file
On that file, we will specify what to do for each button... in this exampl, only change the relay state :
<B1>
<P>DP(P B1);RY(1,T);</P>
<R>DP(R B1);</R>
</B1>
<B2>
<P>DP(B2);RY(2,T);</P>
</B2>
<B3>
<P>DP(B3);RY(3,T);</P>
</B3>
<B4>
<P>DP(B4);RY(4,T);</P>
</B4>
Remark : DP is the short form for Display and RY for Relay. Both are equivalent. See documentation for more details.
Save ant reboot the device.
You should get :